Mini · coming later
The small one
One ballast pump, two plane servos, depth and pitch held for you, a failsafe for lost signal and for going too deep, and setup from a phone. A carrier for a Raspberry Pi Pico 2 W, 51 mm by 31 mm.
Designed and rule-checked. Firmware run on a simulated boat. Not yet built.
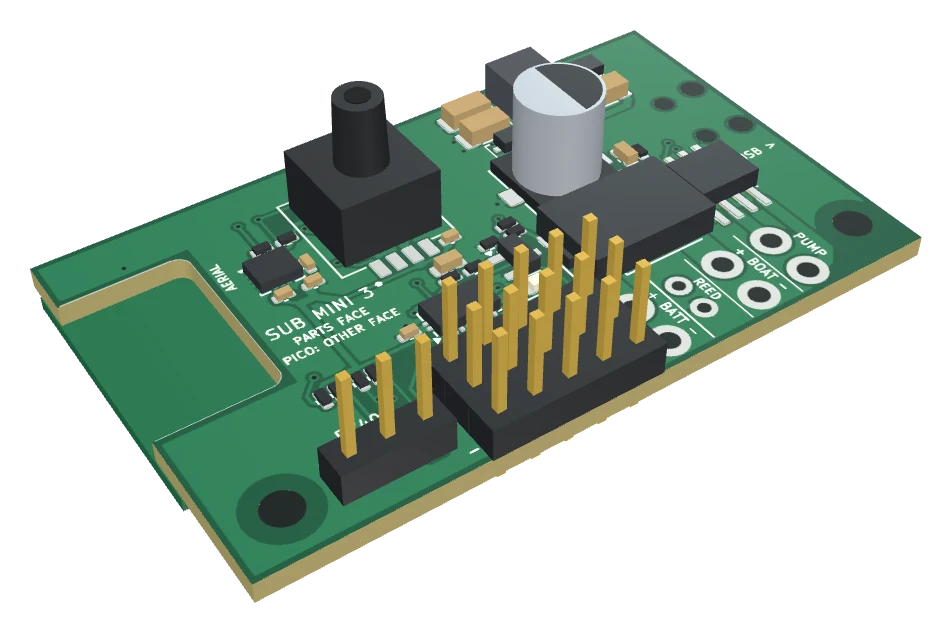
A 3D model made from the board's manufacturing files, with simple blocks for the parts. Not a photograph: no board has been built yet. The Pico is on the other face: press Pico face to turn the board over.
The Mini is designed, and its firmware has been run against a simulated boat like the Commander's. Before it is offered it will be redrawn for assembly by hand, as the Commander has been, so its size and some details on this page may change.
The Commander comes first. This board is not part of the planned Kickstarter campaign, and it has no date and no price yet. Ask to be told when it is ready.
What it does
The essentials
- One pump, both waysForwards fills the tank, backwards empties it. Centre stick is stop, and the further from centre the faster. A stick, a knob or a three-position switch will do.
- Keeps count of the tankThere is no sensor on the tank. Teach the board how long a fill takes and it counts the pump's running time, stops a fill when the count says full, and shows about how full the tank is.
- Depth regulatorHolds a depth with the front planes. With rear planes only, it can hold depth by tilting the boat while under way, by up to an angle you set: about 10 degrees is suggested.
- Pitch regulatorHolds the boat level with the rear planes.
- FailsafeLost signal, too deep, or the depth reading lost below 20 cm: the front planes go to full rise and the pump runs to empty the tank for the longest emptying time you have set. The rear planes go on holding the boat level, or bow-up if tilting is turned on.
- Power and setupMagnet switch-on, setup from a phone over the board's own Wi-Fi, switch-off from the phone or by itself when left alone.
- RX40 linkSets the channel of an RX40 receiver over a three-wire lead, if one is fitted.
No battery monitor, no leak detector, no lights or other switched outputs, no second tank, no gas valve. It does not power the receiver or the servos, and it has solder pads for its wires where the Commander has screw terminals. If you need any of those, the Commander has them.
Like the Commander, it does not steer the boat or run the drive motor: the rudder servo and the speed controller plug into the receiver as usual.
How it is built
A Pico on a carrier
The Raspberry Pi Pico 2 W is a small, widely sold controller board. It brings the processor, its memory, the Wi-Fi radio and aerial, a micro-USB socket and a button for loading firmware. The Mini is the board underneath it that carries everything a submarine needs and the Pico lacks: the pump driver, the sensors, the magnet switch, the buffers for the radio and servo signals, and the connectors.
Using a Pico keeps the hardest parts of the circuit in a module that Raspberry Pi already makes in large numbers and has had approved as a radio. It also means the Mini's own board has only 40 small parts on it.
Two faces
Parts one side, Pico the other
The parts face carries the small parts, the pressure sensor, the pin block and the RX40 header. The Pico is soldered flat to the other face. Everything with holes sits in a strip 10 mm wide along one long edge, clear of the Pico.
The board works either face up. Parts face up puts the servo plugs and the pressure tube on top, with the USB socket still reached from the end.
Connections
What goes where
Four pairs of solder pads for wires, and one block of pins for ordinary servo leads: the minus pin at the board edge, plus in the middle, signal innermost.
Parts face
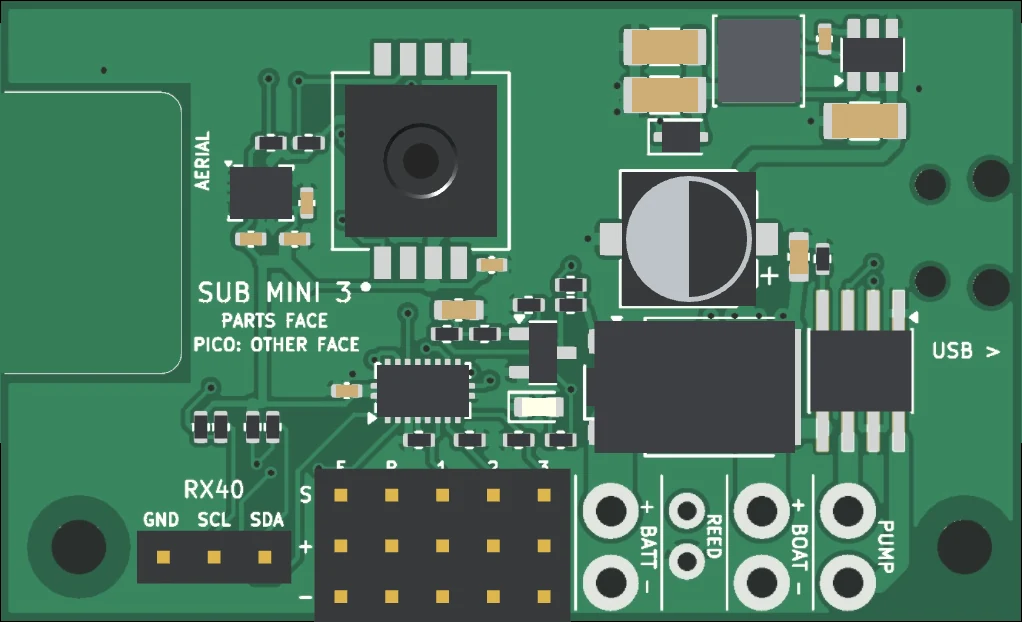 1234567891011
- BATT Battery, 7 to 14 V. Wires soldered in: + is the pad nearer the middle of the board.
- REED Magnet switch, two small pads. No polarity.
- BOAT Switched battery out to the speed controller and the rest of the boat, about 6 A.
- PUMP The ballast pump motor, either way round.
- F and R Front and rear plane servos.
- 1, 2 and 3 Patch leads from the receiver: pump, planes, regulators on. They also bring the 5 V for the two plane servos.
- RX40 Three-wire lead to an RX40 receiver, to set its channel. Left empty with any other receiver.
- Pressure sensor A tube from its port to the outside of the hull.
- Lamp Lights when the board is on.
- Aerial cut-out The Pico's aerial lies over this gap. Keep metal, batteries and wiring away from this end.
- Mounting holes Two M2.5 holes, one at each end of the strip. Use a nylon screw at the aerial end.
Pico face
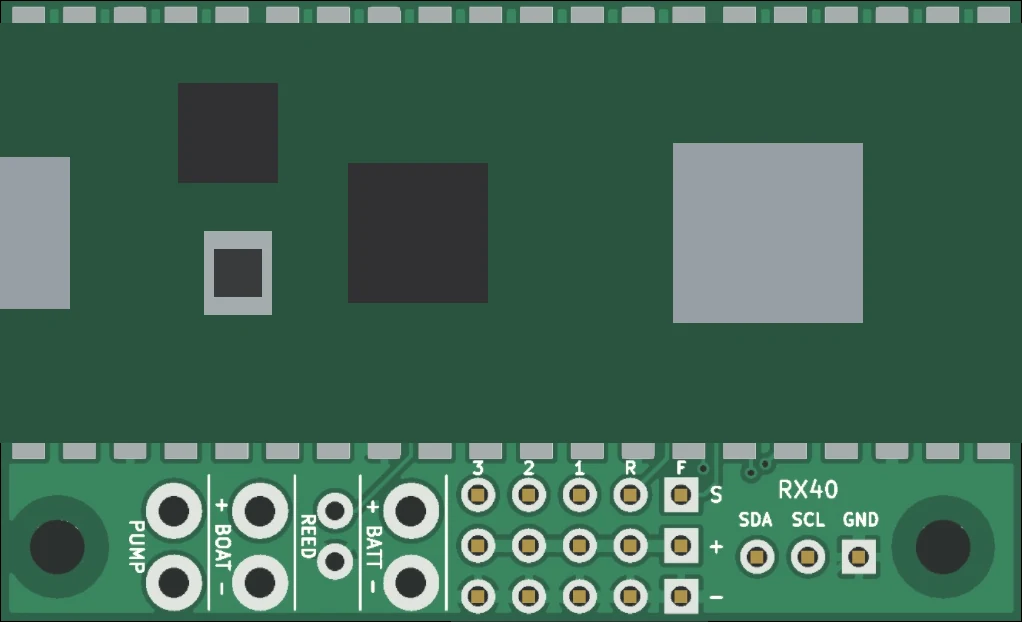 1234
1234- Micro-USB On the Pico, at the end away from the aerial. For loading firmware.
- BOOTSEL The Pico's button. Held while plugging in USB for the first firmware load.
- Radio The Pico's Wi-Fi, for the setup page. Its aerial is at this end of the Pico.
- Solder side The pin block, header and wire pads are named on this face too.
Drawn from the 3D model of the board, not a photograph.
The setup page
Five tabs
Status, Pump, Sensors, Tuning and Power. First setup is five steps on the phone: check the pump direction, time a fill, set level and zero depth, check the plane directions, then switch the transmitter off and watch the failsafe work.
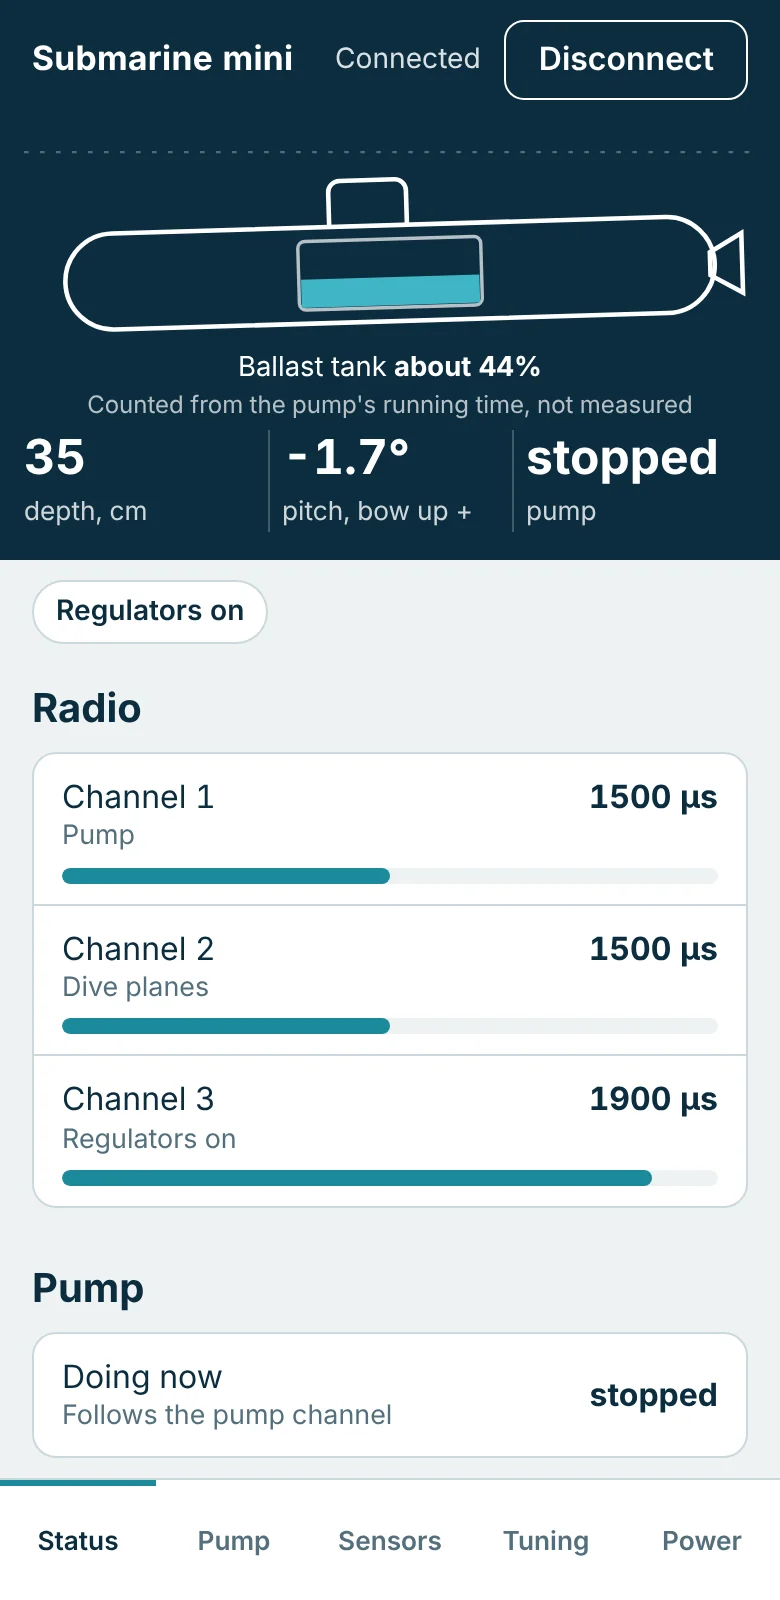
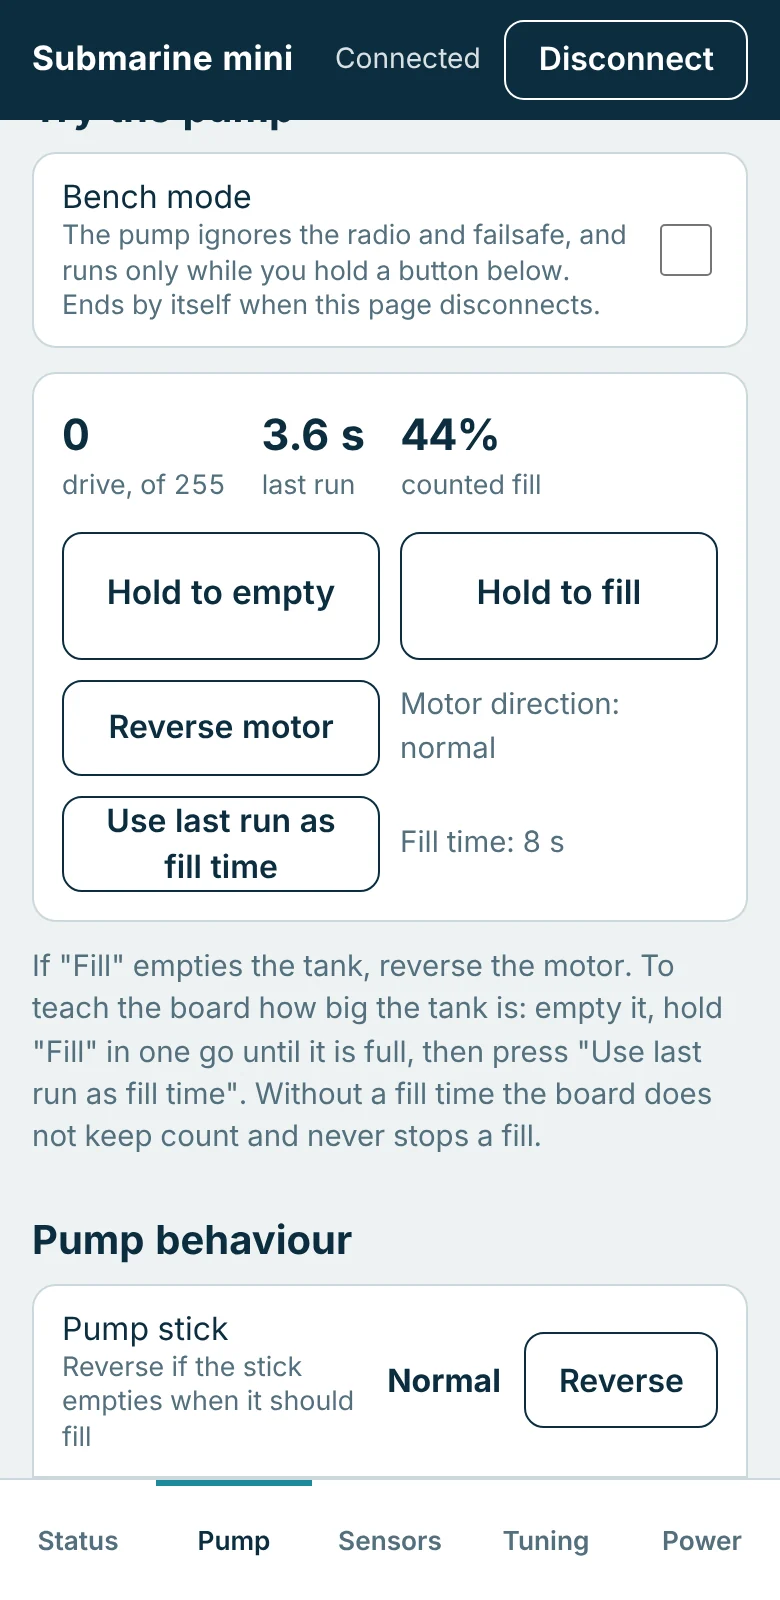
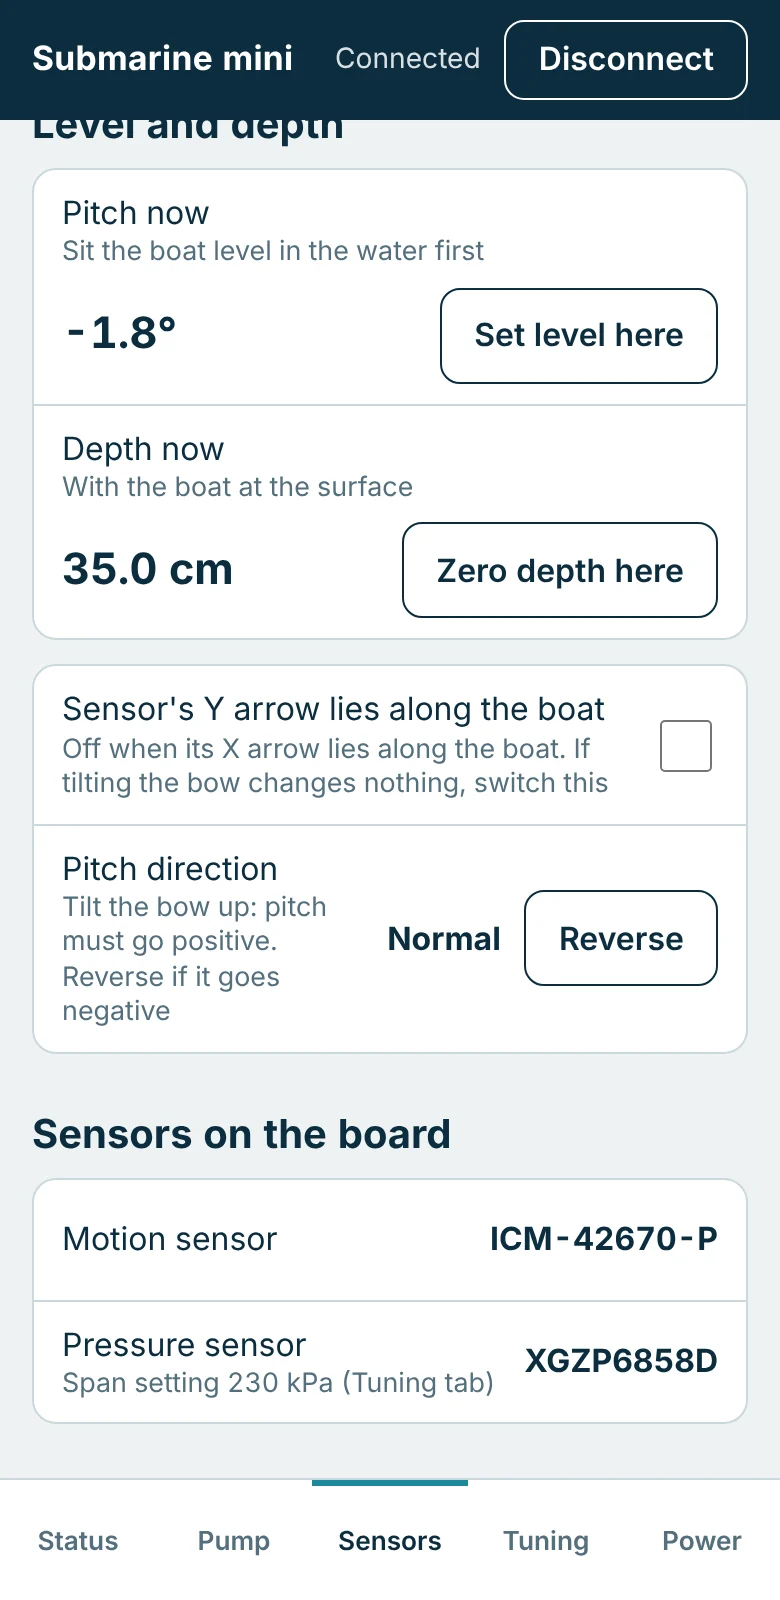
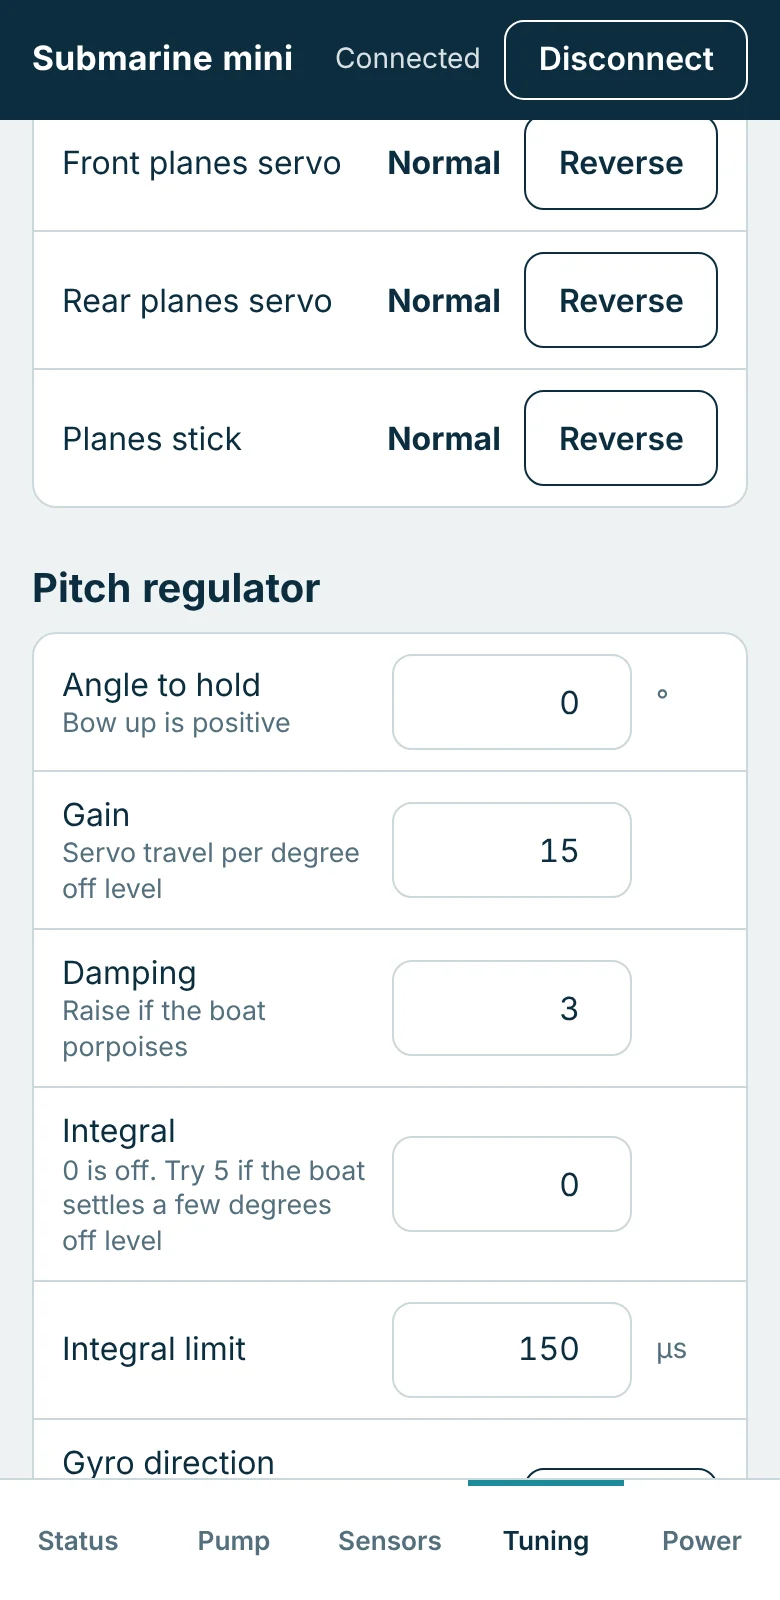
These are pictures of the real setup page, served by the board's own firmware running on a computer against a simulated boat. No hardware was involved.
Specification
The numbers
| Size | 51 × 31 mm, with a 9 × 14 mm cut-out under the Pico's aerial. About 15 mm thick over the pressure port, without plugs. |
|---|---|
| Construction | A carrier board with 40 surface-mount parts on one face and a Raspberry Pi Pico 2 W soldered flat to the other. It comes with the Pico fitted. |
| Mounting | Two M2.5 holes, both along one long edge |
| Battery | 7 to 14 V. No reverse-polarity protection: use a polarised connector. |
| Through the board to BOAT | About 6 A, switched by the magnet latch |
| Receiver inputs | 3 servo-pulse inputs, 3.3 V or 5 V (never more than 5.5 V), buffered. Any function can be put on any of the three. |
| Servo outputs | 2: front planes and rear planes, buffered. A boat with one set of planes uses one of them. |
| Pump driver | 1 reversible driver for a pump that draws about 2 A running. Current limited to 3.2 A at start-up and stall, 20 kHz drive, speed proportional to the stick. |
| Tank level | No sensor. The board times the pump and shows about how full the tank is. |
| Depth | Digital absolute pressure sensor with a tube port (CFSensor XGZP6858D). It reads to about 10 m of water in its catalogue 20 to 200 kPa version, and to about 15 m in a 20 to 250 kPa version if the maker will supply it. |
| Pitch | Accelerometer and gyro on the board (TDK ICM-42670-P). Mount the board flat, either face up, and set the direction on the phone. |
| Control loop | 50 times a second, on its own processor core, with a watchdog that restarts the controller if the loop ever stops for two seconds |
| Controller | Raspberry Pi Pico 2 W: RP2350A, 4 MB program memory |
| Setup link | The Pico's own 2.4 GHz Wi-Fi as an access point, page at 192.168.4.1. The same commands work over USB. |
| RX40 link | Three-pin header (GND, SCL, SDA, 3.3 V signals) that sets the frequency of an RX40 receiver |
| Firmware loading | Micro-USB on the Pico, with its BOOTSEL button. No programmer needed. |
| Power switch | Magnet and reed switch to turn on. Off from the phone, or by itself after ten minutes with no radio and no phone (adjustable). |
| Wiring | Battery, boat, pump and magnet-switch wires soldered into pads. One block of pins for servo leads: F, R, 1, 2, 3. |
| Supply for receiver and servos | Not from this board. They take their 5 V from the speed controller or a BEC, as usual. |
| Low battery | The pump driver stops below about 6.5 V at the board |
Design figures, taken from the circuit and the parts' data sheets. None has been measured on a finished board yet. Compare with the Commander.
In the boat
What you add
- A radio set and receiver that work under water, with two or three channels for the board. The RX40 joins to it by patch leads.
- A ballast tank with a pump that can run both ways and draws about 2 A or less.
- One or two plane servos.
- A 7 to 14 V battery on a polarised connector.
- A 5 V supply for the receiver and servos: the speed controller's, or a separate BEC.
- A reed switch and a magnet, and a tube for the pressure sensor.
- A soldering iron. The battery, boat, pump and magnet-switch wires are soldered to the board.
Know before you fit it
Limits
- It is not waterproof. The board lives in the dry part of the hull. Only the pressure tube goes outside.
- No reverse-polarity protection. A battery connected backwards will damage it.
- The tank count starts from empty at switch-on. Empty the tank before switching off.
- The pump stops below about 6.5 V. A nearly flat 2S lithium or six-cell NiMH pack stops the pump before anything else.
- Fix it firmly and flat. The pitch sensor is on the board. Both mounting holes are along one long edge, so rest the other edge on a foam pad or in a slot.
- Keep metal away from the aerial end, the end with the cut-out.
- The RX40 pins run at 3.3 V. Do not put 5 V on them.
The Commander comes first
The Mini follows once the Commander has been built and proved. Join the launch list and tick the Mini to hear when it is ready.